How To Convert Or Upscale A Photo
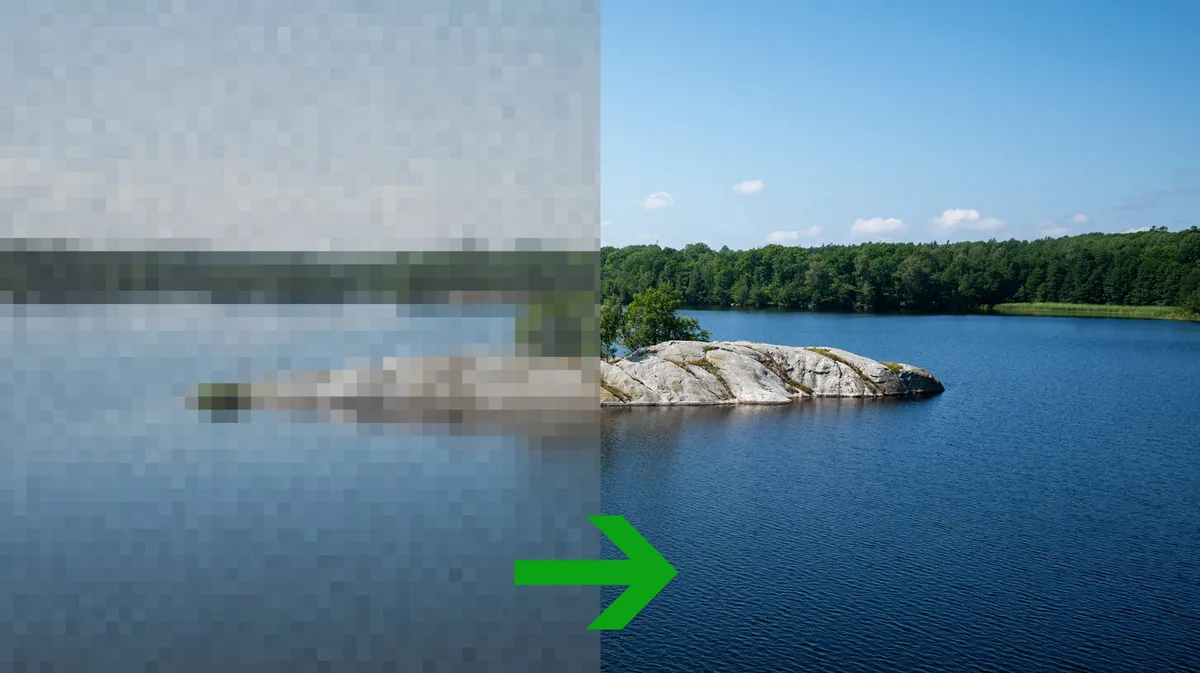
Andrii__Ivaniuk/Shutterstock On the surface, upscaling a photo seems like a simple enough task. You open your photo editing tool of choice, find the size adjustment menu, enter the new size for your photo and the app does the rest. Forget photo editing tools. Even the default photo viewer on your Mac or Windows PC can do it.
But the results of upscaling are often inconsistent. It can be annoying to see an old family photo look even blurrier after running it through an image upscaler. It's even worse with pixel art, which becomes a paint splotch with a vague outline after you upscale it 4x. Fortunately, these issues can be minimized if you use the correct method for the kind of photo you're upscaling.
Format is another consideration, which is determined by whether you'll edit it, the composition of the photo and its overall purpose.
Conventional upscaling methods work on the basic principle of adding new pixels that are an average of those surrounding them. The difference is how many pixels are being factored into that average and the weight assigned to each. For this reason, traditional upscaling won't magically make your photos more detailed.
Nearest-neighbor upscaling is an exception to the pixel-averaging principle because it simply copies the nearest pixel wholesale. This makes it perfect for pixel art, diagrams and solid geometric shapes, as it retains their blocky appearance. But on regular photos and anything with a gradient, nearest-neighbor introduces aliasing, which makes the edges look pixelated.
A step up from nearest-neighbor is bilinear upscaling, which creates a new pixel by taking an average of its four surrounding pixels. This method doesn't produce a blocky look but can often make images overly soft, as if they're slightly out of focus. Use it for images that aren't sharp to begin with. Avoid it for upscaling close-up shots and anything else with fine details.
Bicubic upscaling strikes a good balance between resource usage and image quality. Instead of four pixels, it considers the surrounding 16 pixels, with more weight given to the closest ones. Thanks to this, it produces sharper images than bilinear upscaling, all without the jagged edges seen in nearest-neighbor upscaling. It's a safe bet for most types of photos, but know that it can introduce halos unlike the previous two methods.
There are other more sophisticated upscaling algorithms such as the Lanczos method. But these take up more processing power, and I didn't find the results that much better than bicubic upscaling. Try Lanczos only if you're dissatisfied with bicubic upscaling.
Where traditional upscaling methods add new pixels based on the surrounding ones, AI upscaling uses prediction. It works by creating a new image, which, when shrunk down, would most closely resemble the one that you asked it to upscale. And it can do so because AI models are trained on millions of high-resolution images.
Images upscaled using AI often look noticeably cleaner and more saturated. This makes a big difference when the source images are degraded, and you want the gaps filled in without too much focus on accuracy.
5News aggregated this summary from the outlet’s public feed. The full article, with all the context, is on www.engadget.com — the content belongs to Engadget.